Showing posts with label Vegetarian. Show all posts

Tuesday, February 22, 2011

Vegan Stuffed Peppers

Peppers are one of my all time favorite vegetables. I think I can seriously put them in everything. I'll chop them up raw and put them in salads. I'll mix them in pasta or risotto. I'll grill them on skewers. My favorite way to eat peppers is probably to dice them up and put them in an omelet for breakfast. I don't think I have ever made bell peppers the star of a recipe though. I think its time. I've always wanted to make stuffed peppers. One day, I'll become brave and make myself some stuffed jalapenos or some other spicy pepper, but for now I think I'll start with the basic bell pepper.

The thing about peppers is that you can stuff them with anything. How about Quinoa, or ground beef, or oats? I don't know about the oat thing. I've heard of it being done but it sounds a little strange to me. Anyway, I decided I would start with rice as my base. Brown risotto rice to be specific. Get creative though, use whatever you have on hand.

Vegan Stuffed Peppers
Ingredients
-2 cups cooked rice- if you have leftovers, go for it. If you're making the rice though, make it just a tad undercooked since it will cook more when you bake it
- 1 15 oz can diced tomatoes with their juice
- 1 medium red onion, chopped
- 2 cloves garlic, minced
- 2 tablespoons olive oil
- 1/2 teaspoon salt
- 5 short turns on a pepper grinder, or just a little bit of pepper
- 1/2 teaspoon dried basil
- 6 medium-sized bell peppers
- about 3/4 cup grated vegan cheese

To begin, coat the bottom of a pan with the olive oil and add in the chopped onion and mixed garlic. Saute until the onions start to brown. Set aside.

Next, mix together the rice tomatoes, salt, pepper, and basil. Add in the onions and garlic. Stir it all around really well. You can do this ahead of time if you want to! Just mix it all together, put in some tupperware and pop it in the fridge.

Now is when you are going to want to preheat your oven. I set mine, since I'm currently in the UK to 160 degrees C. That converts to 320 degrees F or somewhere around there.

While you're waiting for the oven to heat up, prepare the peppers for stuffing. Cut the top off of each pepper, cutting enough so that the stem comes off with it. Save the top, because you will put it back on before baking. Empty and rinse out the inside of the pepper making sure to dry afterward. Also, make sure that your peppers can stand on their own. You may have to shave a little off the bottom. Just make sure that you don't shave off so much that it makes a whole in your pepper. Then it will be a hot mess all over your pan oven, other peppers, etc. Last thing to get your pepper prepped is to rub it with a little olive oil, or really any vegetable oil, on both the hollowed out part of the pepper and the top.

Once the peppers are all cleared out and rubbed up, fill each one
with about 1/2 cup of the filling, depending on the size of your peppers, and place them on a baking tray. It should fill to evenly line up with the top edge. Now just put the tops on and place the tray in the oven. You will bake for a total of about 45 minutes, turning the tray 90 degrees halfway through. Also, 10 minutes before they're done, take them out, take off the tops and top with grated cheese. Keep the tops off and place them beside the pepper on the tray, stem side down, and place the tray back in the oven for the remaining time. They should look a little charred in places and they should taste wonderful!

Monday, January 17, 2011

Vegan Basil Pesto

I think its time to introduce you to my favorite little kitchen helper... my Magic Bullet. I'm willing to bet that most of you have seen the infomercials and I'm also willing to bet that at least a couple of you were tempted to buy it. It may not be the miracle that the infomercial portrays it to be, but its always been a big help to me. I mean, I use it to grind my coffee, make smoothies, and as a make shift food processor. Its cheap too. I can't really afford a nice food processor and I don't really have a lot of room for a ton of different appliances, so a magic bullet is convenient for us college-age, tight-budgeted, or small-kitchened cooks. Another thing I love about my personal magic bullet... it was free. I won it at my high-school senior picnic and its still going strong about 3 years later.

Here he is! And notice the outlet converter... yes, I packed my magic bullet and carried it all the way to London.

This is my latest magic bullet creation: Vegan Basil Pesto. It is really good with pasta, or spread on a sandwich, or for anything really.

If you don't have a magic bullet, you can use a food processor obviously. And all though I hate to be disloyal to my little helper, a food processor is probably better because you can better control the consistency and how much you blend everything.

Vegan Basil Pesto
Ingredients
2 cups packed basil leaves
1/4 cup pine nuts
3 tablespoons extra-virgin olive oil
juice of 1 whole lemon
4 cloves garlic, chopped
3 tablespoons miso paste
1/2 teaspoon salt


The cast of characters

*if you can't find miso paste or don't want to use it you don't have to, but it adds the flavor that the cheese would have given it in a non-vegan pesto

And once you have all of the ingredients out, it's super easy to prepare. You simply add all of the ingredients into your magic bullet/food processor and blend until its a creamy consistency.

Here's the sauce, all jarred and ready to go. That's one green sauce.

Another note about pesto- the basil can brown when heated so I would add the sauce after everything is cooked and try not to heat it too much. The taste isn't affected but a brownish-greenish sauce just isn't pretty.

pesto tossed with some pasta and topped with dairy-free parmesan and pine nuts

Monday, December 27, 2010

Moroccan Tomato Lentil Soup

Here is the third soup for your wintery enjoyment. This soup is inspired by my favorite soup from Au Bon Pain. With all of my food allergies, my on campus food choices are slim. ABP is one place I can count on, however. They always list what's in all of their food and advertise which of their soups and rice bowls, etc are gluten and dairy free. Another bonus is that they post it all online too so I can plan ahead.

This Moroccan Tomato Lentil soup is an homage to their French Moroccan Tomato Lentil Soup. It is not the same recipe but it contains many of the same ingredients and has the same overall taste.

Moroccan Tomato Lentil Soup

Ingredients
1 cup dried lentils
3 tablespoons olive oil
1 medium yellow onion, diced
1 14oz can roasted crushed tomatoes, chopped
2 large fresh rosemary sprigs
7 cups chicken stock
1 can navy beans
curry powder
salt and pepper

In a small bowl, cover the dried lentils completely with water and soak for two hours. After two hours, drain and rinse the lentils, then set aside.

In a large pot, heat the olive oil then add in the diced onion. Cook for about 5 minutes until the onion is softened and starts to brown. Next, add in the rosemary and lentils and stir to coat. Sprinkle with curry powder (as much or little as you want).

Now add in the tomatoes and chicken stock. Bring the soup to a boil and then cover and lower to a simmer. Cook for 30 minutes then add in the can of navy beans. Bring back to a simmer and cook for another 30 minutes.

Before serving, remove the rosemary sprigs and salt and pepper to taste.

Tuesday, December 21, 2010

For a Cold Night In: Curried Butternut Squash and Apple Soup


I have recently come home from college for winter break and thus far that has meant sleeping and watching TV and not doing too much else. Today, however, I woke up with the urge to cook. I went to whole foods and bought the ingredients I needed, and when I got home I began a cooking frenzy with my beautiful puppy loyally by my side. I only took 2 short breaks. The first to watch part of Twilight: Eclipse with my sister (please refrain from passing judgement on my movie choice) and the second to go to the orthodontist. Since its cold outside, though not near as cold as DC, and all I want to do is watch christmas movies, my mom and I decided soups would be fun to make. This was he first one and it is really tasty. It is hearty and just the right amount of spice, perfect for a dark winter evening.

Curried Butternut Squash and Apple Soup

Ingredients
3 1/2 pound cubed butternut squash (1-inch cubes)
1 1/2 sweet onions
2 McIntosh apples
3 tablespoons olive oil
celtic sea salt
pepper
4 cups chicken stock
3 teaspoons Thai red curry paste

First, preheat the oven to 425 degrees F. This will be for roasting the squash, apple, and onion.

Next, cut the squash, apples, and onions into 1 inch cubes. Place all three on a baking sheet and sprinkle with the olive oil, salt, and pepper. Toss so that everything is evenly coated. Now you will want to spread this mixture out onto two baking sheets lightly coated with cooking spray so that the vegetable mixture is in thin layer on the sheets. Roast this for about 35 minutes.

When it is done roasting, scrape it off the pan and place it in a large pot. Add a little bit of the chicken stock over medium-low heat and mix with an immersion blender. If you do not have one, you can do these next steps in a blender or food processor. Once you have mixed up the squash until it is pureed. Add more stock and blend again. Keep doing this a little bit at a time until all of the stock is incorporated. At this point, add in the curry paste, 1 teaspoon salt, and 1/2 teaspoon pepper. Mix again so that it is all evenly distributed. Mix until it is a creamy, thick soup and is evenly colored. Keep over heat until it is warm and then place in individual bowls.

To garnish you can ad a couple sprigs of rosemary or homemade croutons.

To make the croutons you can melt vegan butter (such as Earth Balance) and mix in garlic powder. Then drizzle this over cubes of gluten free bread and bake in the oven for 10 minutes. Then turn the oven to broil and let the bread crisp for a minute or two, watching it carefully so that it doesn't burn.


I hope you enjoy the soup! And look forward to more fantastic soup recipes coming in the near future :-)


Thursday, January 21, 2010

Eggplant: A Vegetarian's Best Friend

It wasn't until I stopped eating meat that I discovered eggplant. Now, I love it. It's just so versatile. You can use it as a meat substitute, stuff it, cut it up and put it in anything, or bread it and smother it with cheese to make Eggplant Parm. In this recipe, however, the eggplant really shines on its own. This recipe works well for the holiday season because of its colors, but would also work well in Spring and Summer because of the fresh flavors. It can be used as a side, but I prefer it as a beautiful main dish. 

Cumin Scented Eggplant with Pomegranate and Cilantro
5 cups water
2 1/2 tablespoons sea salt
2 lbs. eggplant (about 2 medium) cut crosswise into 1/2 inch thick slices
olive oil
2 teaspoons ground cumin
1/8 teaspoon cayenne pepper 
2 garlic cloves, minced
pomegranate syrup (recipe follows)
2/3 cup pomegranate seeds
1/4 cup cilantro leaves, chopped

Stir salt into water in a large bowl or casserole dish until dissolved. Soak eggplant for an hour, flipping over halfway through the soak. Drain and pat dry. 

Preheat oven to 350 degrees F. 

Heat a thin coating of oil in a large skillet and saute eggplant over medium-high heat until there are brown spots and softened (about 2 minutes per side). Do this in batches adding more oil as needed until all are done.

Arrange eggplant slices in a single layer on a lightly greased baking sheet. Mix cumin and cayenne pepper together and sprinkle over the eggplant. Put in the oven and roast until golden and cooked through (about 30 minutes).

While eggplant is roasting, create the pomegranate syrup: combine 1 cup pomegranate juice, 12 cup sugar, and 1/4 teaspoon lemon juice in a saucepan over medium heat. 
Stir until sugar completely dissolves. Allow to cook on medium-high for 20-25 minutes. Remove from heat and the syrup will thicken as it cools. 

Also, mix together pomegranate seeds, cilantro, and garlic in a separate, small bowl. 

Once eggplant is roasted, remove from oven and sprinkle with the cilantro, pomegranate seed, and garlic mixture, then drizzle with pomegranate syrup. 

Monday, January 18, 2010

Back to My Tiny DC Kitchen: Berry Vanilla Oatmeal

Since the creation of my blog, a lot of my cooking has been done in my parent's large and well-equipped kitchen because I was home for the holidays. I LOVE cooking in that kitchen. I also kind of love cooking in my little dorm-room kitchen as well because it always presents new challenges. No counter space? I bring in the chair from the living room as an extra work-space. Need another mixing bowl? I use one of my pots. And you can just forget about two people cooking in their at once. To show you that I am not exaggerating when I say my kitchen is tiny, I took a couple of pictures:
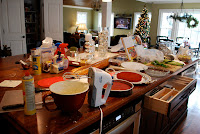
Now, think back to one of my holiday posts where I posted a picture of my parents' kitchen. There is quite a difference! In fact, I'll post the picture again:

This picture doesn't even show the double oven, huge fridge or warming drawer, but you get the idea.

And of course, instead of going to the grocery store every time I want to try a new recipe, I have learned that substitutions are key. This is also an important lesson for me because the Watergate Safeway where I shop isn't necessarily the best-stocked grocery store I've ever come accross.

That's what I had to do for this recipe which I got from Ellie Krieger from Food Network. It is a healthy, quick, and tasty breakfast that you can easily make on a weekday morning and even have the leftovers later in the week.

Berry Vanilla Oatmeal
*This was originally Cherry Vanilla Oatmeal but Safeway didn't have dried cherries or cherry preserves so I played with the recipe a little

1 3/4 cups water
1 cup gluten free oats
1/8 teaspoon salt
1/4 cup dried cranberries
1/2 teaspoon vanilla extract
2 tablespoons raspberry preserves
1/4 cup almond milk
--you can obviously substitute with any kind of dried berry, preserves, and milk that you prefer or whatever you have on hand--


Put water, oats, salt, and dried cranberries into a medium sized sauce pan. Bring to a boil, reduce heat, and simmer for 5 minutes for old fashioned oats and 1 minute for quick cooking oats. Remove from the heat and stir in the vanilla and preserves. Put the oatmeal into bowls and pour 2 tablespoons milk over each bowl. This recipe makes 2 large servings.
**This post was edited on 12/12/10 to make it gluten and dairy free

Friday, January 15, 2010

On the Lighter Side: Vegan Lasagna

When looking for something to serve for Christmas Eve dinner, we decided on a classic family favorite- lasagna. So, the search for such a lasagna recipe began. Where do I look first? Recipezaar.com of course, only the most addicting website to anyone interested in cooking and baking. I simply type dairy free lasagna in the search bar and this is what appears: http://www.recipezaar.com/Easy-Dairy-free-Veggie-Lasagna-96659 . Perfect. No meat, no dairy, and seems simple to me. This recipe also works for vegans! And its lighter and healthier than a normal lasagna. I didn't follow the recipe exactly but did use it as a starting point, so here's what I did:
Also, you can use gluten free lasagna noodles. They are not always easy to find but you can definitely order them online or I am sure if you used a different kind of gluten-free pasta you could make a free-form lasagna-like dish that would taste just as good.

Vegan Lasagna
1 28 oz jar marinara sauce
6 uncooked gluten-free lasagna noodles
2 cups sliced vegetables (I suggest eggplant and squash)
1 (12 1/3 oz) container extra-firm tofu, broken up
1 (8 oz) package soy mozzarella, shredded
4 tablespoons vegan parmesan

Preheat the oven to 375 degrees F. Spray and 11x7 baking dish with nonstick spray.

Spread 1/3 of the sauce over the bottom of the dish. arrange 3 noodles over the sauce in a single layer. Add another 1/3 of the sauce, all of the veggies, all of the tofu, and half of the mozzarella. Then, top with the 3 remaining uncooked noodles in a single layer. Spread evenly with remaining sauce. Cover with foil and bake for about an hour. Sprinkle with remaining cheese and cook, uncovered, about 5 minutes until cheese melts.

Sorry no picture for this one!

Saturday, January 9, 2010

Risotto

One of my new favorite foods is Risotto. It is tasty, versatile, and relatively easy to make. It goes well as a side dish for almost anything and can be made to be pretty healthy. I am listing three different recipes, a fancy risotto, a fun risotto, and one that is super easy and cheap. Traditionally making risotto requires both wine and parmesan cheese, so in that since only the first recipe is a true risotto, but the other two are made in the same way and taste just as good to me but are simpler and require less ingredients.

First, the fancy risotto... recipe courtesy Giada de Laurentiis. I made this with my friend Bethany, again using her Tanzanian vanilla bean, and we had some of our friends over and none of it was left by the end of the night- that's how good it is.

Vanilla Butternut Squash Risotto
4 cups vegetable broth
1 large vanilla bean
3 cups peeled, cubed (i-inch wide) butternut squash (12 oz)
2 tablespoons vegan butter (Earth Balance), plus 1 tablespoon
3/4 cup finely chopped onion (about 1 red onion or 1/2 vidalia onion)
1 1/2 cups arborio rice
1/2 cup dry white wine
1/2 cup dairy free cheese of choice *optional
1/2 teaspoon salt
2 tablespoons finely chopped fresh chives (optional)
In a medium saucepan, warm the broth over medium-high heat and cut the vanilla bean lengthwise. Scrape the seeds from the bean into the broth and then add the bean to the broth as well. When it comes to a simmer, reduce heat to low and add the squash cooking until tender (about 5 minutes), then remove into a side dish. Reduce the heat to very low and cover to keep warm.

Meanwhile, in a large, heavy saucepan melt 2 tablespoons butter over medium heat, add onion and saute until tender but not brown ( 3 minutes). Add rice and stir to coat, then add wine and simmer until almost evaporated (3 minutes). Add a half a cup of the heated broth at a time, until absorbed (2 minutes). Once the last of the broth is absorbed test rice and if it is no yet tender add water and continue process until the rice is tender.

Once ready, remove the bean and toss in the squash, cheese if desired, salt, 1 tablespoon butter, and optional chives.
Now, it's time for the fun risotto. It is served in a hollowed out lemon cup. It is really cute and would be good served at a luncheon or a light summer meal. Serving in the lemon cup also helps with portion control for all of you out there who are trying to keep New Year's resolutions. This recipe is also from Giada, but simplified and made healthier by leaving out the cheeses.

Risotto in a Lemon Cup
2 cups chicken broth
1/2 cup water
1 large shallot, diced
3 tablespoons vegan butter (Earth Balance)
1 cup arborio rice
1/2 cup dry white wine
1/2 a lemon, zested and juiced
3/4 teaspoon salt
3/4 teaspoon pepper
6 lemons, for serving

In a medium saucepan, bring the broth and 1/2 up water to a simmer, cover, and keep hot over low heat.

In a medium, heavy saucepan, melt 2 tablespoons butter over medium heat. Add shallot and saute until tender but not brown (about 3 minutes). Add the rice and stir to thoroughly coat with the butter. Add the wine and simmer until almost evaporated (3 minutes). Then add 1/2 cup broth at a time adding water and continuing if necessary, just like the process used in the previous risotto.

When done, stir in remaining butter, lemon juice, and zest, salt, and pepper.

To serve, cut 1/4 inch off of the bottom of each lemon so that they stand on their own. Then, cut i inch off of the top of each and scoop out the flesh. Fill each hollowed lemon with about 1/2 cup risotto.
Last Risotto... This is the easiest risotto. It doesn't require wine and the ingredients are simple and cheap, yet it tastes just as good in my opinion. You can also change this recipe around easily to fit your tastes. You can substitute the vegetable broth with chicken broth or switch up the vegetables you use. I have added broccoli and that worked as well. I have also heard that you can do this in a rice cooker as well if you don't want to watch the pot. I have not tried it but if anyone does, let me know how it works out.

Simple Asparagus Risotto
1 tablespoon vegan butter (Earth Balance)
1/2 vidalia onion, chopped
3/4 lb asparagus, cut into 1 inch long lengths
3 garlic cloves, minced
1 1/2 cups arborio rice
4 cups vegetable broth
salt, to taste
Heat broth in a saucepan, covering to keep warm over low heat.

In a separate pan, melt butter add onions on medium-low heat. Cook 4 minutes, then add garlic and cook 1 more minute. Add rice and stir until well coated. Ad 1/2 cup broth, stirring until absorbed. Add asparagus.

Continue adding broth, 1/2 cup at a time, stirring constantly, till absorbed each time (20-25 minutes). Add water and continue process as necessary. Add salt to taste.
*This post was edited on 12/12/10 to make it gluten and dairy free.